
How To Prepare A Quilt Backing
You’ve finished your quilt top and now it’s time to get basting! But in order to baste you need a backing. If you are making a quilt that is bigger than 30” square you will need to piece fabric together to create a large enough backing. This guide will help you piece the perfect backing when using common quilting cottons. Just follow these three steps and you’ll have a perfect sized quilt backing in no time!
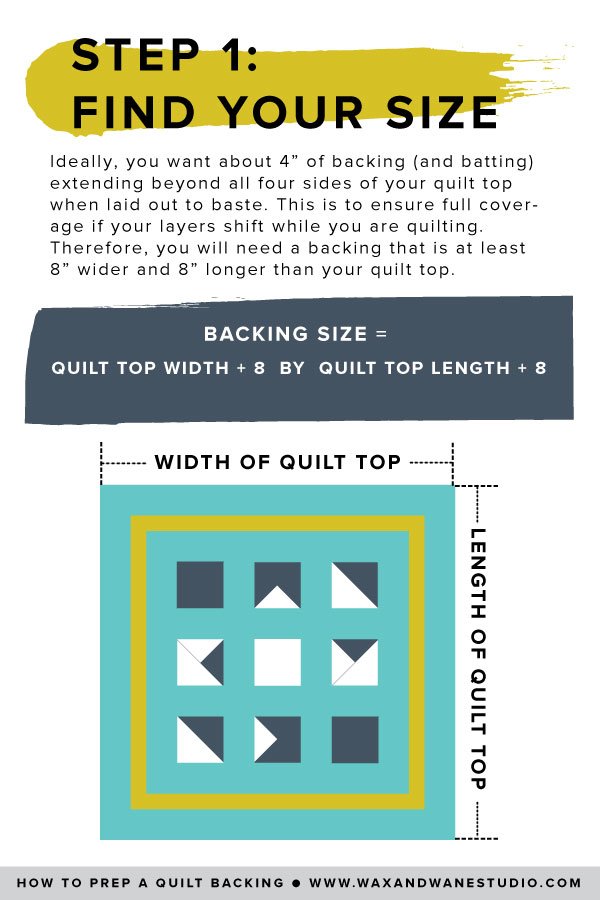
Step 1: Find Your Size
Ideally, you want about 4 inches of backing fabric (and batting) extending beyond all four sides of your quilt top when laid out to baste. This is to ensure full coverage if your layers shift during the quilting process.
So, you will need a quilt backing that is at least 8 inches wider and 8 inches longer than your quilt top.
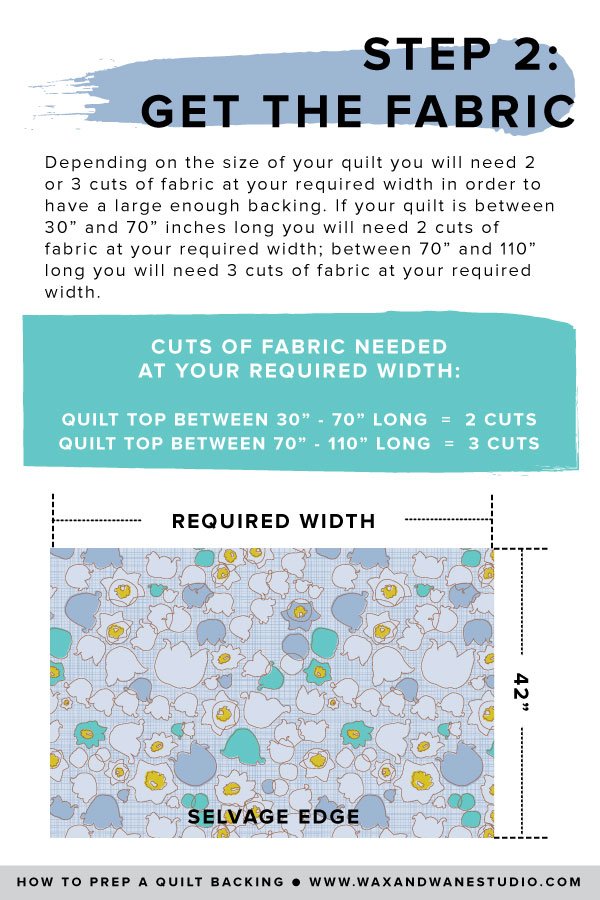
Step 2: Get the Fabric
Cotton broadcloth, which is most commonly used for quilting, is usually around 42” wide. Traditionally when making a quilt backing, the width of the fabric is used to span the length of the quilt top. Therefore, one width of fabric will only cover a quilt top that is less than 42”, or 30” when factoring in selvages and overhang.
In the infographic below I’m using the term “cuts of fabric” instead of “widths of fabric” so as to not be confused with the width of your quilt top.
Depending on the size of your quilting you will need 2 or 3 cuts of fabric at your required width. If your quilts in between 30 and 70 inches long you will need 2 cutes of fabric. Quilts between 70 and 110 inches long will need 3 cuts of fabric.
Raid your stash or visit your favorite fabric shop and get yourself the right amount of fabric needed for your size quilt. All cuts of fabric must be at your required width (see Step 1) or 8 inches wider than your quilt top. While using one type of fabric for your entire backing is a beautiful and timeless option don’t be afraid to get creative.
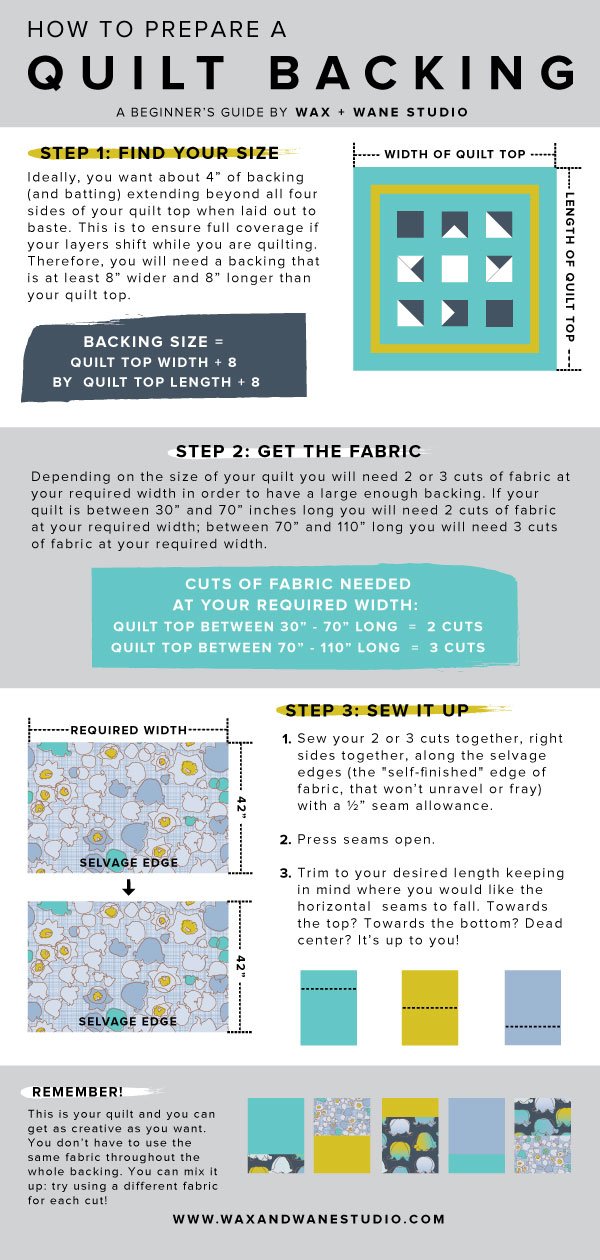
Step 3: Sew It Up!
Once you’ve determined how big your backing needs to be, and how much fabric to get, it’s time to assemble it!
First, sew your 2 or 3 cuts of fabric together, right sides together, along the selvage edges, with a half-inch seam allowance.
Then, press the seams. Open or to the side, your preference.
Finally, trim to your requires length (remember: length of your quilt top plus 8). Keep in mind where you would like the horizontal seams to fall. Toward the top? Toward the bottom? Dead center? It’s up to you.

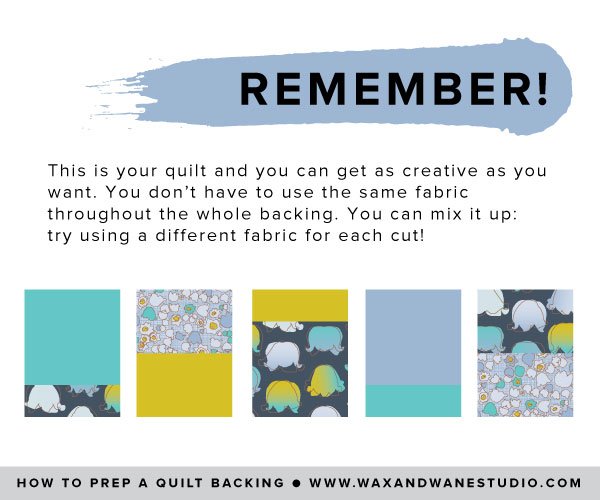
Remember
This is your quilt and you don’t have to follow the rules. Get as creative as you want! You don’t have to use the same fabric throughout the whole quilt backing. You can mix it up! Try using a different fabric for each cut!
You did it! You assembled the perfect quilt backing so now you can baste and quilt that beauty. If you’re anything like me, you’re going to love finishing your quilt and will be jumping to the next project as soon as possible. So, when you’re ready to create another quilt backing, here’s a handy infographic with all the steps included in one place. Pin to share with your friends or save the image below for your future reference!
Dream it
〰️
Quilt it
〰️
Dream it 〰️ Quilt it 〰️

Free Hand Quilting Course
Learn the basics of hand quilting at your own pace, on your own time.
This course gives you the freedom to pull on the thread of your creativity or find peace in the structure of the known. Tap into a creative and de-stressing outlet and carve out time to work on yourself. With mindfulness as a foundation, you’ll make space for a creatively therapeutic practice that supports you in processing the emotions of an often too-heavy and too-busy world.


