How to Make a Simple Spell Throw Quilt

What to Expect
This tutorial is part of the Quilt Rune mini quilt collection which, at the time of this writing, is made up of ten mini quilts: Binary Star, Rivulet, Protostar, Gyre, Vase, Bestla, Fenrir, Vena Cava, Newel, and Bolt. The goal of this tutorial is to provide you with an idea of how to combine the mini quilts together to create larger-sized quilts and/or spark your creativity to create something totally different. This tutorial contains just one idea, but the possibilities are literally endless. My hope is that you use this as a springboard to create your own unique Simple Spell quilt.
If you’d like more details, fabric requirements, and cutting instructions for this quilt, check out the Simple Spell Pattern Extension.


The Design
As the name implies this is a simple design to highlight your favorite runes. I used the Binary Star, Rivulet, Protostar, and Gyre patterns for my project but you can use any of the mini quilt patterns from the Quilt Rune collection.
Choose the runes that represent the qualities you want to explore for yourself or the person you're making the quilt for. Then put the energies into the making process by meditating on them or thinking about how you want them to help.
If you’d like more details, fabric requirements, and cutting instructions for this quilt, but still choose your own Quilt Runes check out the Simple Spell Pattern Extension.

Layout Inspiration
The Quilt Rune collection is currently made up of ten mini quilt patterns. The idea is to mix and match your favorites. Here are a few ideas of which Quilt Runes may look nice together in this Simple Spell configuration. Click the individual quilt pattern names below to view them.


What You Need
For this quilt, you need six mini quilt tops to make a throw-sized quilt or two mini quilt tops to make a baby-sized quilt plus some additional fabric for sashing and borders.
Throw Top Assembly
Step 1: Make the First Row
Sew three mini quilt tops into a row with 3-inch sashing, (Figure A), press seams, and set aside.

Step 2: Make the Second Row
Sew three more mini quilt tops into a row with 3-inch sashing, (Figure B), press seams, and set aside.

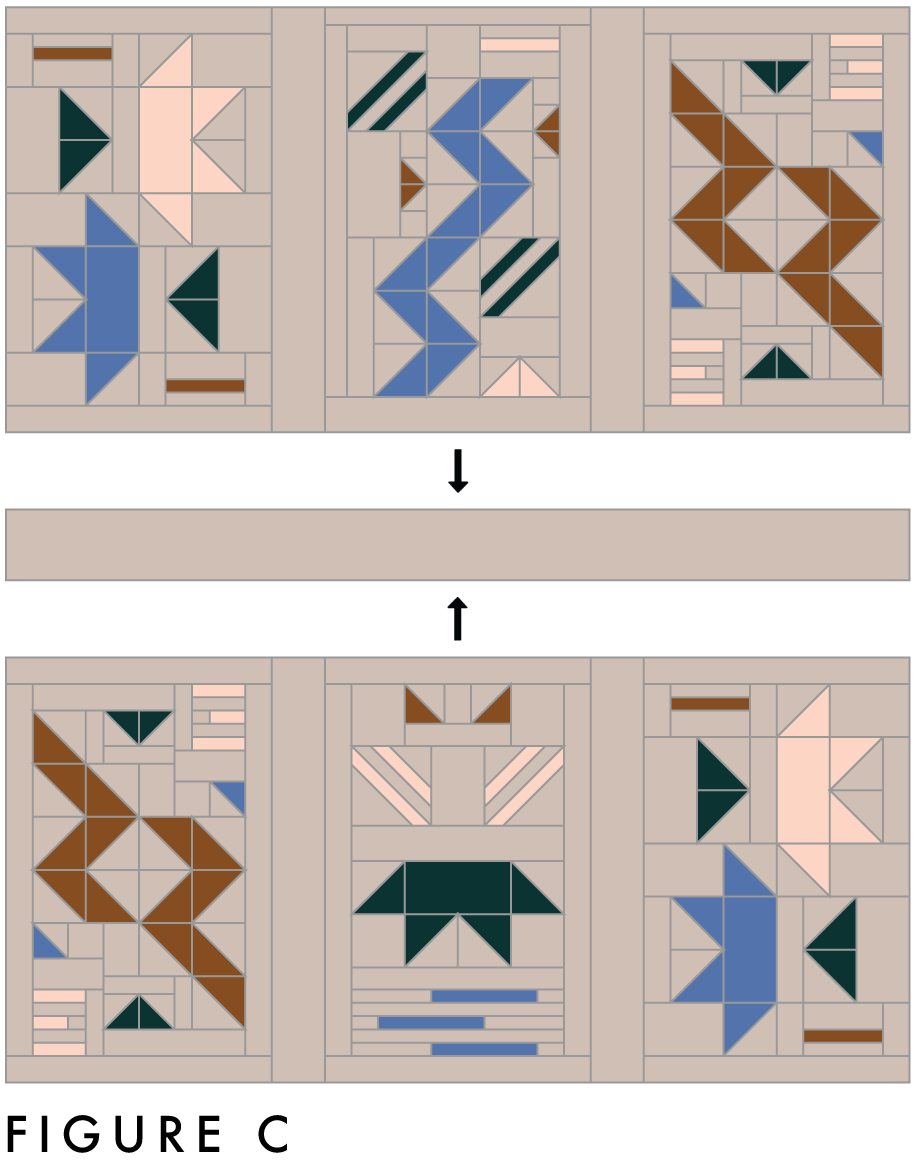
Step 3: Sew the Rows Together
Sew the two rows into a column with 4-inch sashing, (Figure C) and press seams.
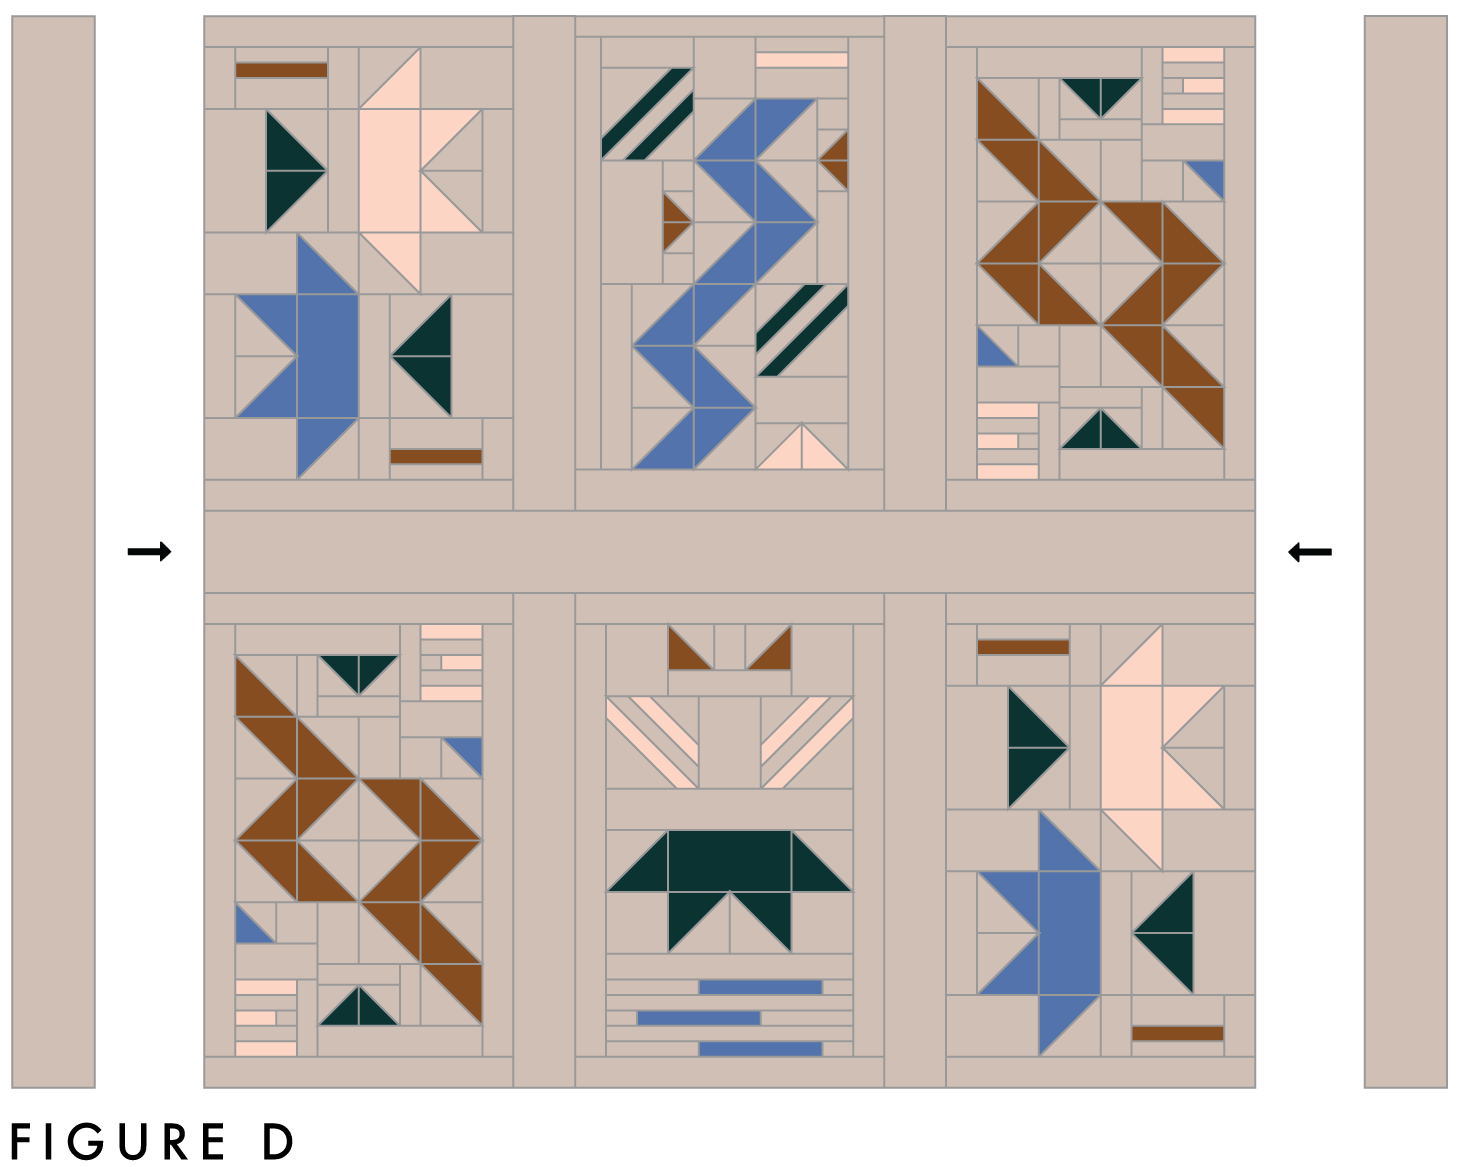
Step 4: Add the Side Borders
Add borders (I used 4-inch) to the left and right of the quilt top (Figure D) and press seams.
Step 5: Add the Top and Bottom Borders
Add borders (I used 4-inch) to the top and bottom of the quilt top (Figure E) and press seams.

Baby Top Assembly
Step 1: Sew the Mini Quilts Together
Sew two mini quilt tops into a row with 2-inch sashing, (Figure F), press seams, and set aside.

Step 2: Add the Side Borders
Add borders (I used 4-inch) to the left and right of the quilt top (Figure G) and press seams.

Step 3: Add the Top and Bottom Borders
Add borders (I used 7-inch) to the top and bottom of the quilt top (Figure H) and press seams.

Finish Your Quilt
And there you have it! Once you have the quilt top assembled you’re ready to finish the quilt. Follow the steps below to complete your project.
Prepare your backing fabric. Need help? Check out my Backing Prep Tutorial.
Lay your backing fabric right side down on a flat surface, followed by your batting. Lay your quilt top right side up on top, making sure you have about 4” of batting and backing extending beyond all edges of your top.
Baste as desired.
Quilt as desired. Want to try Hand Quilting? Check out my e-course The Art of Hand Quilting.
Trim off the excess backing and batting, make sure all corners are square and edges are straight.
Prepare your binding or facing fabric. Need help? Check out my Binding Prep Tutorial.
Bind or face as desired.
Share your makes! I love seeing your quilt and would love to hear from you. Send me a message at anna@waxandwanestudio.com!
New to Quilting?
Need some help figuring out where to start? Check out my library of Learn to Quilt tutorials to help you on your quilting journey.


More Tutorials