Beginner’s Guide to Quilting (Part One)
Hi friends, welcome to the third post in my Learn to Quilt blog series. The goal of this series is to help first-time quilters navigate their way through the learning curve. My previous post in this series was an explanation for “what” and this post is more of a “how-to”. Here you will find a quick overview of the first steps of the quilting process with a bit of helpful information. Beginners, let me know what you think. Did I cover all your questions? Is there more you need to know? Experienced quilters, what was the most confusing part about quilting when you started? Let me know in the comments!
Starting a Quilt
There are lots of steps in the quilting process and it can quickly get overwhelming for a first-timer. This post is to help you get started by covering the first three steps of the quilting process: buying and caring for fabric, cutting fabric, and sewing. Just enough information for you to finally start that project, but not too much to send your head spinning. Once you tackle these first steps and gain more confidence in your abilities, then you can move on to basting, quilting, and binding (which will be covered in another post) to finish your first quilt.
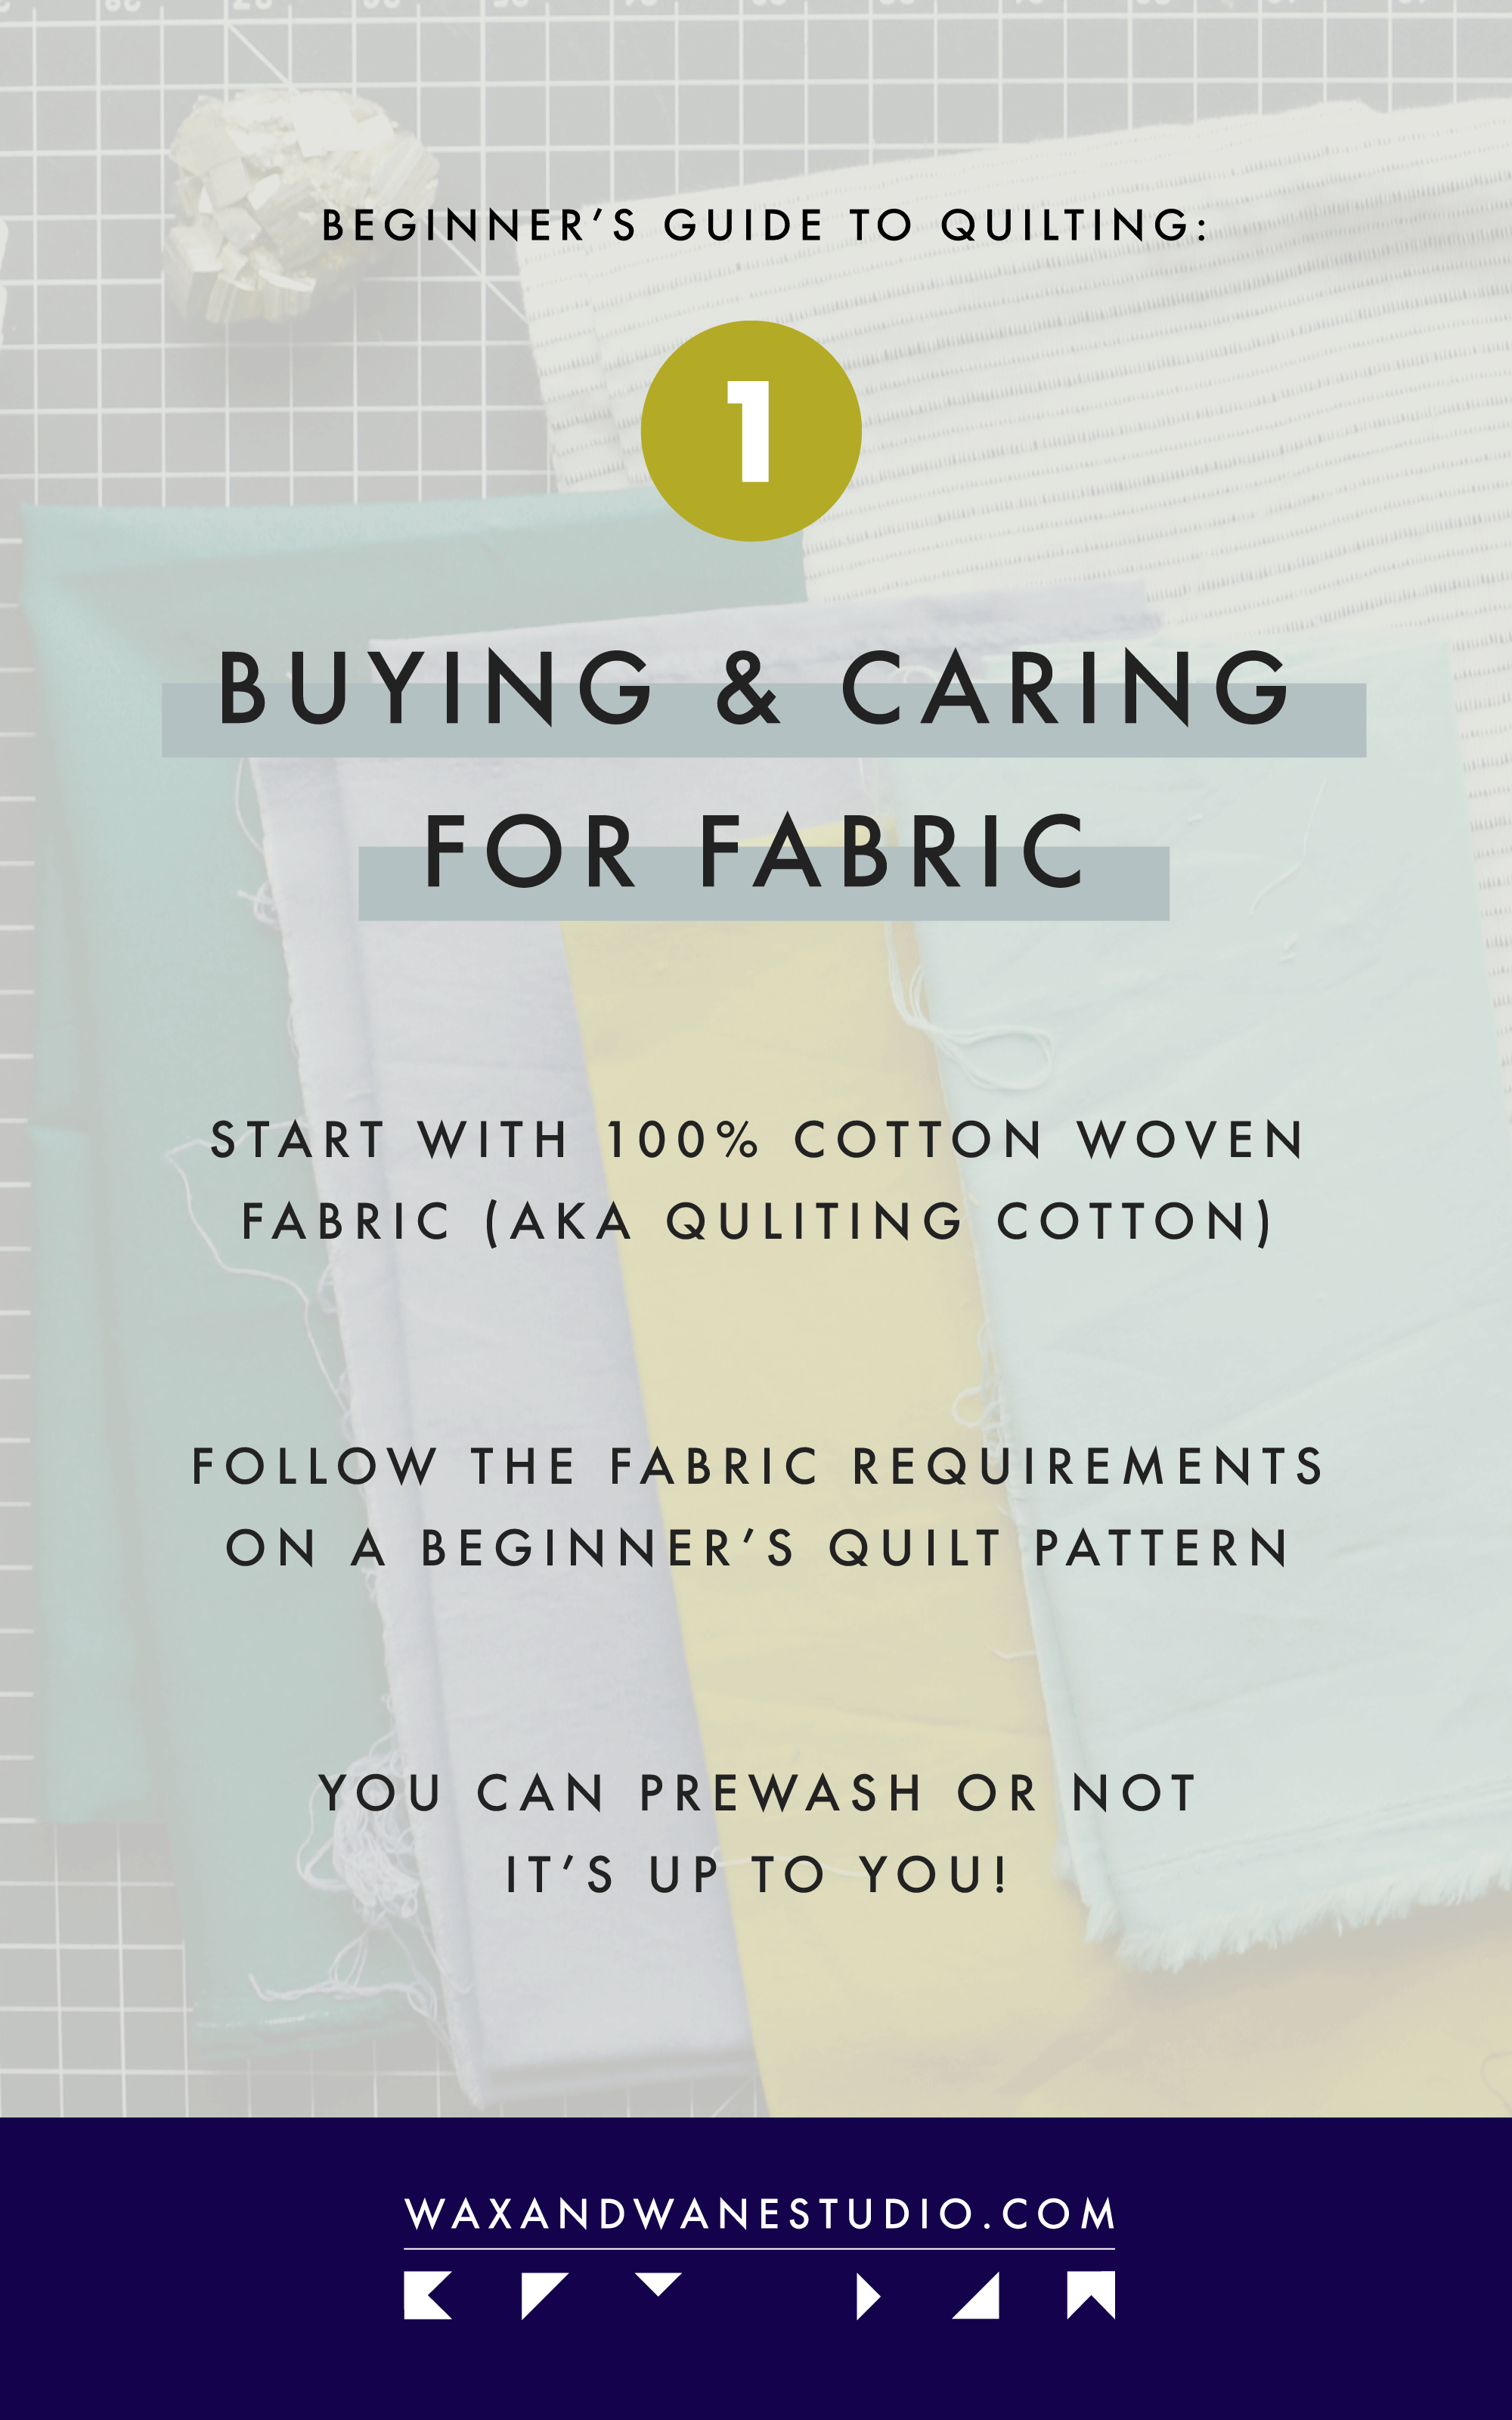
Buying & Caring for Fabric
What Fabric to Buy for Quilting
As I mentioned in my What You Need to Start Quilting post, if you’re a first-time quilter I recommend using 100% cotton, woven fabric. Specifically, Quilting Cotton, which can be purchased at a quilt shop and/or most fabric shops. Quilting cotton is woven at around 40-45 inches wide, folded in half, then wrapped around a bolt, and usually sold by the yard which is 36 inches (I’m based in the US, it may be sold by the meter depending where you live). The smallest increment most shops will sell is a quarter yard, though occasionally you may find someone who will sell eighth-yard pieces. So, when you purchase a yard of fabric you’ll receive a piece of fabric that is approximately 40 by 36 inches.
If you’re following a quilt pattern, it will tell you how much of each color fabric you need for that particular project. If you’re making a whole cloth quilt estimate how much fabric you need based on your desired finished dimensions. This guide to calculating and preparing quilt backing may be helpful. If you’re buying fabric to bind a quilt check out this guide. If you’re winging it or creating your own quilt design try drawing it out on graph paper to help calculate how much fabric you need (and don’t forget to factor in seam allowance!).
Washing Fabric for Quilting
When it comes to preparing your freshly bought fabric before cutting into it there are two schools of thought. The first is to pre-wash the fabric to ensure all the excess dye is washed out and to pre-shrink it. This can be done by hand or in a standard washing and drying machine with the same detergent you would use for washing clothes. In addition, you can use a color catcher during the washing process to catch all that pesky rogue dye. If you choose to go this route it is really important to then iron the fabric so you can accurately measure and cut the pieces need for your quilt. If you want to take this one step further you can starch your fabrics to make them a bit stiffer, helping each piece you cut retain its shape. This will make it easier to sew and match seams.
The second school of thought is to throw caution to the wind and dive right into the quilt-making process without prepping the fabric in any way. Both approaches are valid and widely used though you may find a quilter friend or two who have very strong opinions one way or the other. Personally, I used to be a die-hard pre-washer but I’ve never used starch. My reason for washing was to pre-shrink the fabric as I’ve never run into problems with dye bleeding (though I know people who have had problems with this!). But, as I’ve come to appreciate hand quilting and its lovely crinkly texture more and more, I’ve stopped pre-shrinking my fabric. Instead, once my quilt is complete I wash and dry it on a gentle cycle, which shrinks everything, creating the most glorious quilty crinkles possible. As you can see, in the photo below the Rivulet mini quilt on the left has not been washed yet. The Binary Star mini quilt on the right has been washed, resulting in a bit of shrinkage, and some beautiful texture.
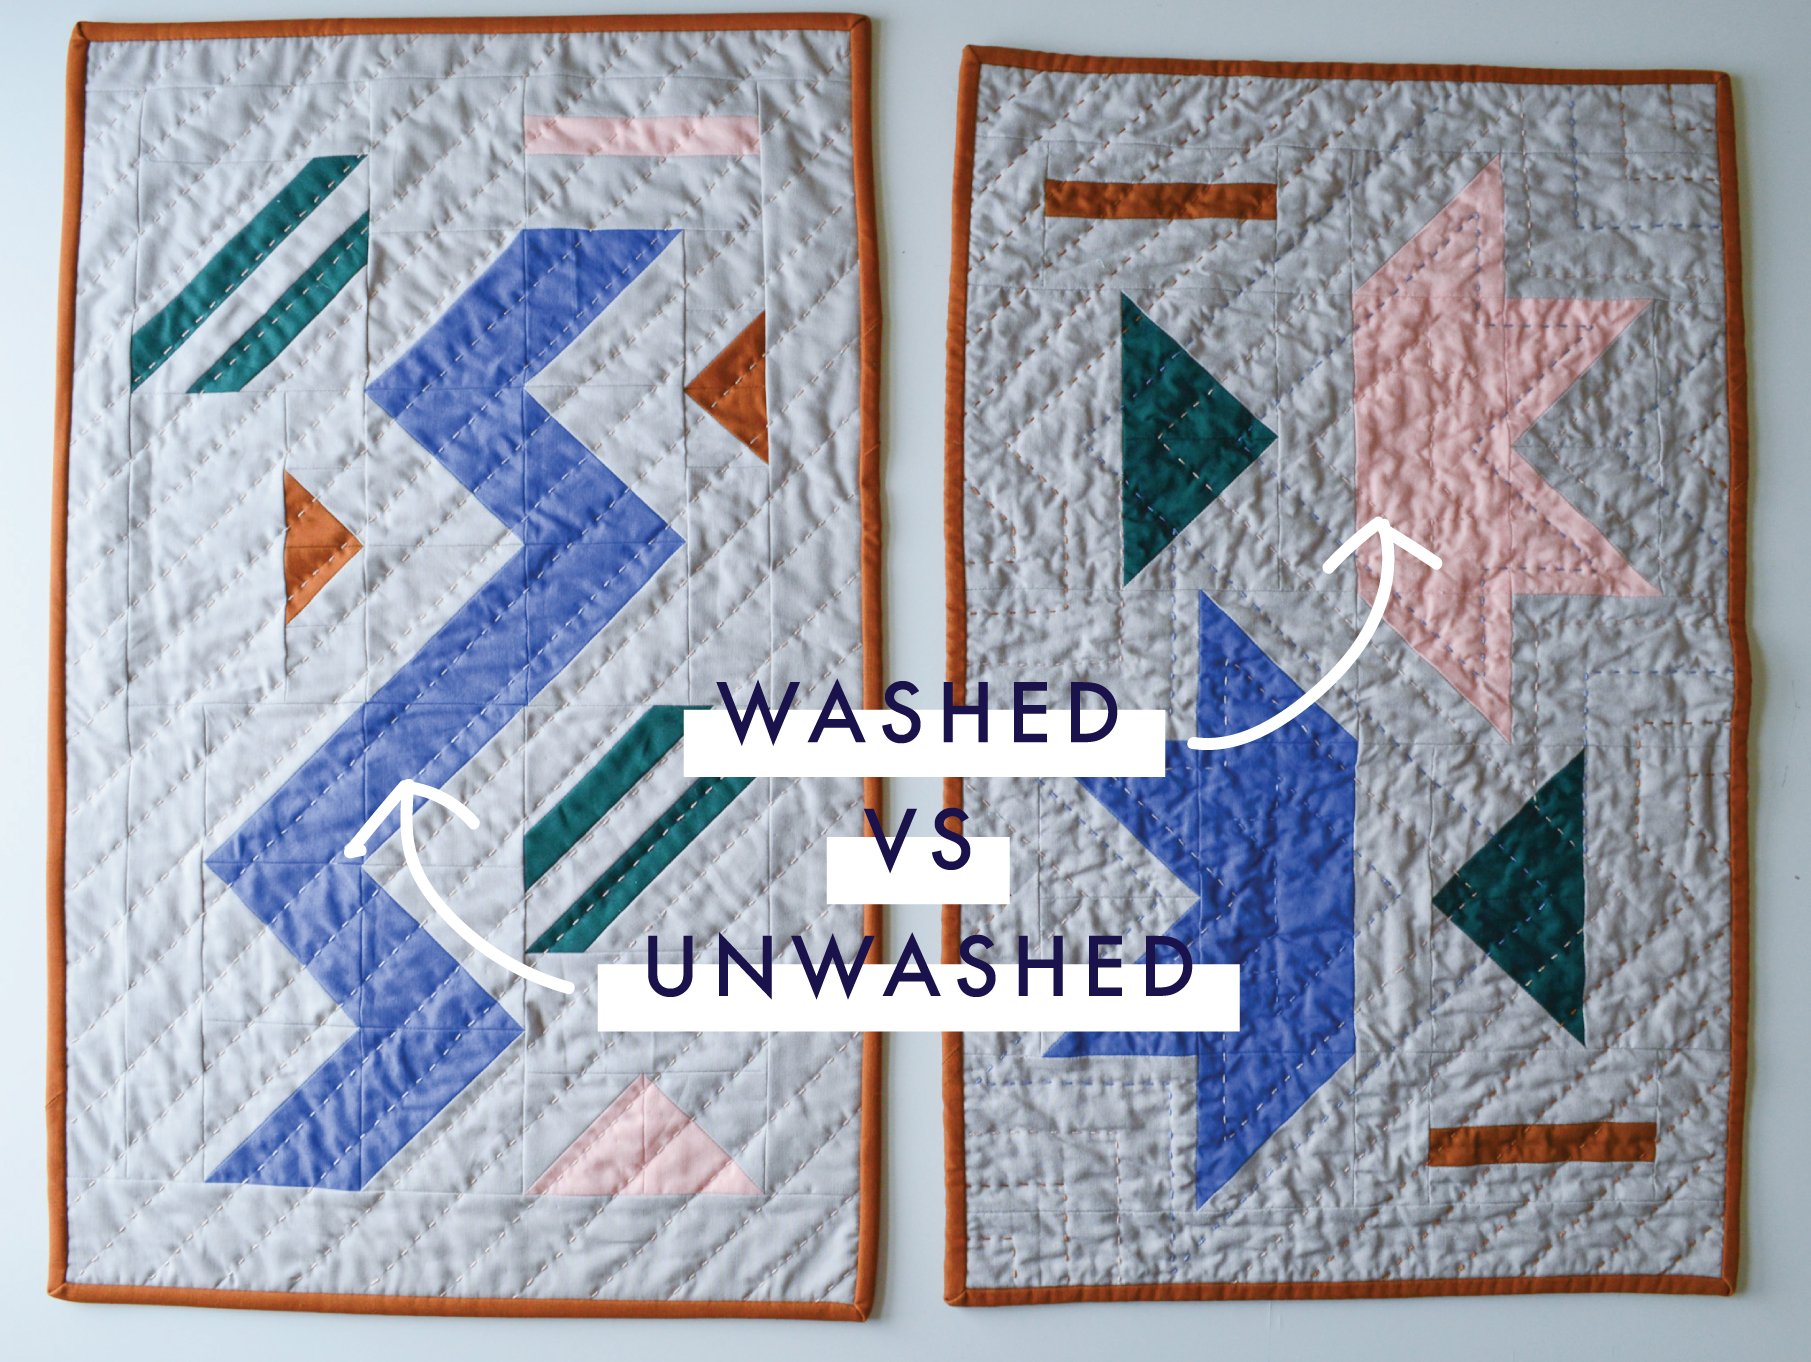

If you’d like some more in-depth information about the pre-washing fabrics debate check out the blog post that Cottoneer recently published. It’s a fantastic post about this subject including detailed pro and con lists for both pre-washing and not washing.

Cutting Fabric for Quilting
Rotary Cutters
While you can get away without purchasing a rotary cutter for your first quilting project I don’t recommend it. A rotary cutting will save you so much time and probably a bit of frustration. They are quicker than cutting tens, possibly hundreds, of squares or rectangles with scissors. Also, paired with a quilting ruler they are much more accurate. A 45 mm rotary cutter is perfect to start with. As you get more comfortable with quilting you can add to your cutting collection with larger blades for quicker cutting, and smaller-sized blades for more intricate cutting.
Quilting Rulers
Ever hear the saying “measure twice, cut once”? It’s a wise, though seemingly tedious-sounding statement. Fortunately, Quilting rulers, make practicing this a lot quicker and easier. The idea of a quilting ruler is that you can measure and cut at the same time (but be sure to always double-check your measurements before slicing). I recommend starting out with a 24 ½ inch by 6 ½ inch quilting ruler as it will cover all your basic needs.
Cutting Mat
Unless you have a surface that you don’t mind ruining, I recommend getting a cutting mat. A mat that is at least 18 inches by 24 inches would be ideal for a beginner, especially for dealing with yardage (as opposed to small pieces of fabric), but you could manage with something smaller if needed.
How to Cut Fabric
Regardless of whether you join team prewash or team starch or not definitely make sure your fabric is wrinkle-free before cutting. This will ensure the pieces you cut are as accurate as possible. Let’s say you bought half a yard of quilting cotton. Start with your fabric on your cutting mat so the fold is at the top of the mat, and the selvages or “open” part is facing toward you. From your perspective, the flat, folded piece of fabric should measure about 18 inches wide and 20-22 inches high.
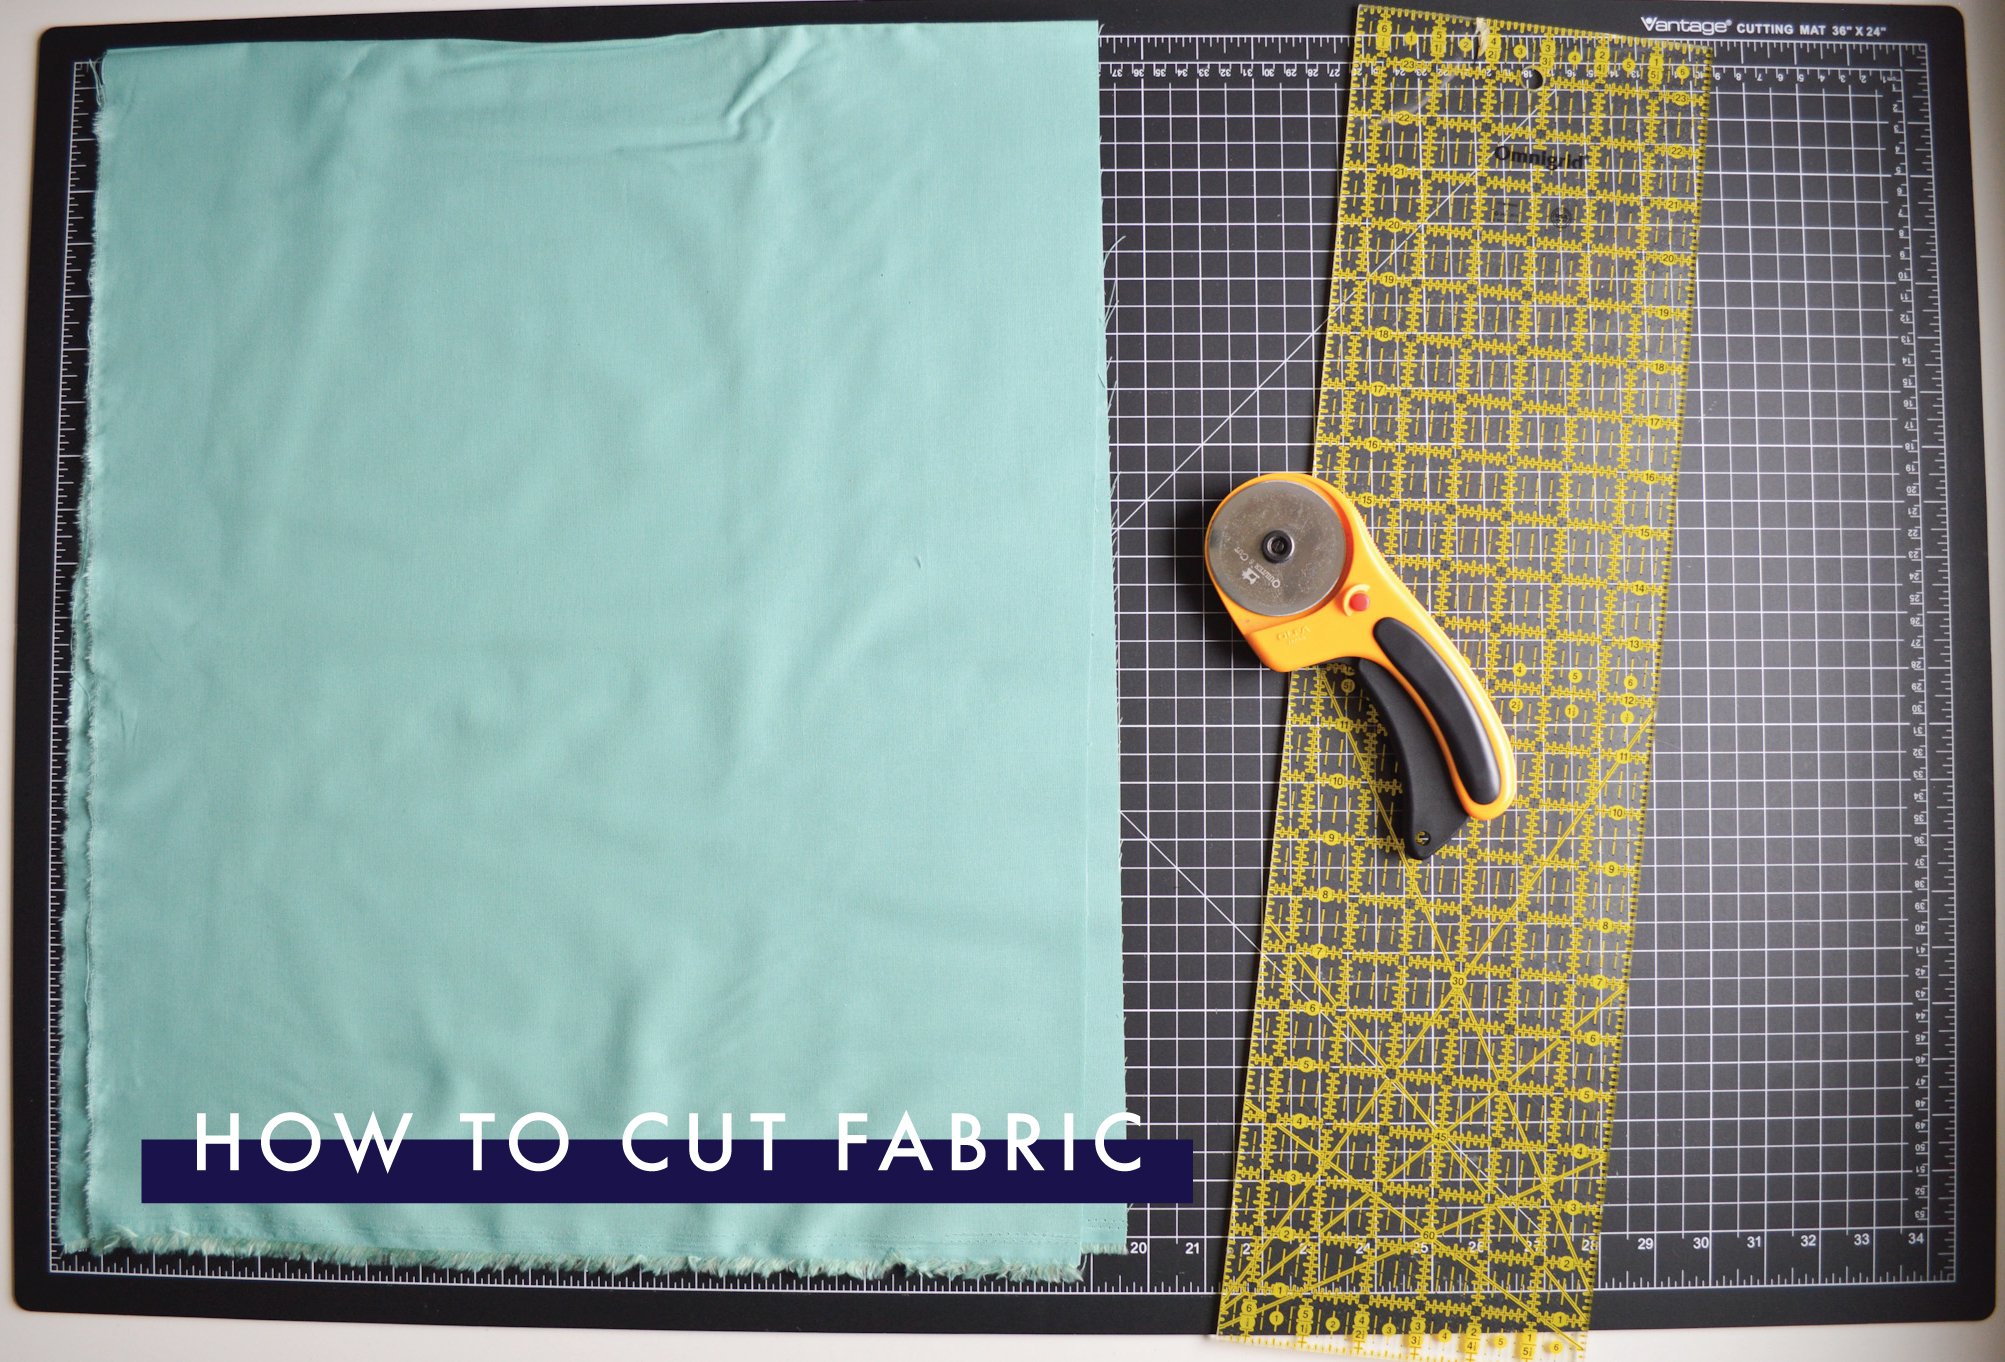
The first thing you’ll want to do is square up one of the sides so you have a nice, straight edge to start with. I like to use the line of the selvage as a 90-degree guide as opposed to the fold. Sometimes the fabric isn’t folded perfectly in half before being put on the bolt so the fold line isn’t always a good indicator of the direction of the fabric grain.
Do this with your 24½-inch by 6 ½-inch quilting ruler by lining up the horizontal 1-inch line with one of the selvage lines and getting the edge of your ruler as close to the edge of your fabric as possible. Then, using your rotary cutter, slice off the edge as I show you in the video below.
Once you have a neat, straight edge to work with you can start cutting out your pieces. Most quilt patterns will have the pieces listed by similar lengths or widths so they can be cut from the same strip of fabric. Or the pattern will direct you to cut a specific width strip, then sub-cut pieces from that strip. Or better yet, especially for bigger-sized quilts, the pattern will include a cutting diagram to show you the most efficient way to cut the pieces.
Let’s say you need six 4-inch by 4-inch squares. Start by cutting a strip of fabric that is 4 inches wide. Do this by lining up the edge of the fabric with the verticle 4-inch line on your ruler, like in the following video.
Then cut off the selvage and cut off 4-inch square pieces by lining up the edge of the fabric with the verticle 4-inch line on your ruler, like in the video below. Remember the fabric is folded in half so you’ll produce two of every piece. If you need an odd number of pieces simply unfold the strip and cut off one piece at a time.

Start Sewing
Right Sides Together
One of the most important rules of sewing is to always sew the right sides together or RST. This means, when you’re sewing two pieces of fabric together you want the face or “right” side of the fabrics to be facing each other. If you’re working with solid fabrics this is not much of an issue as most solids are reversible. But if you’re working with printed fabric, the side you want to be on display is the “right” side. The reason for this is so all the seams will be hidden on the back or inside of your project.
Quarter Inch Seam Allowance
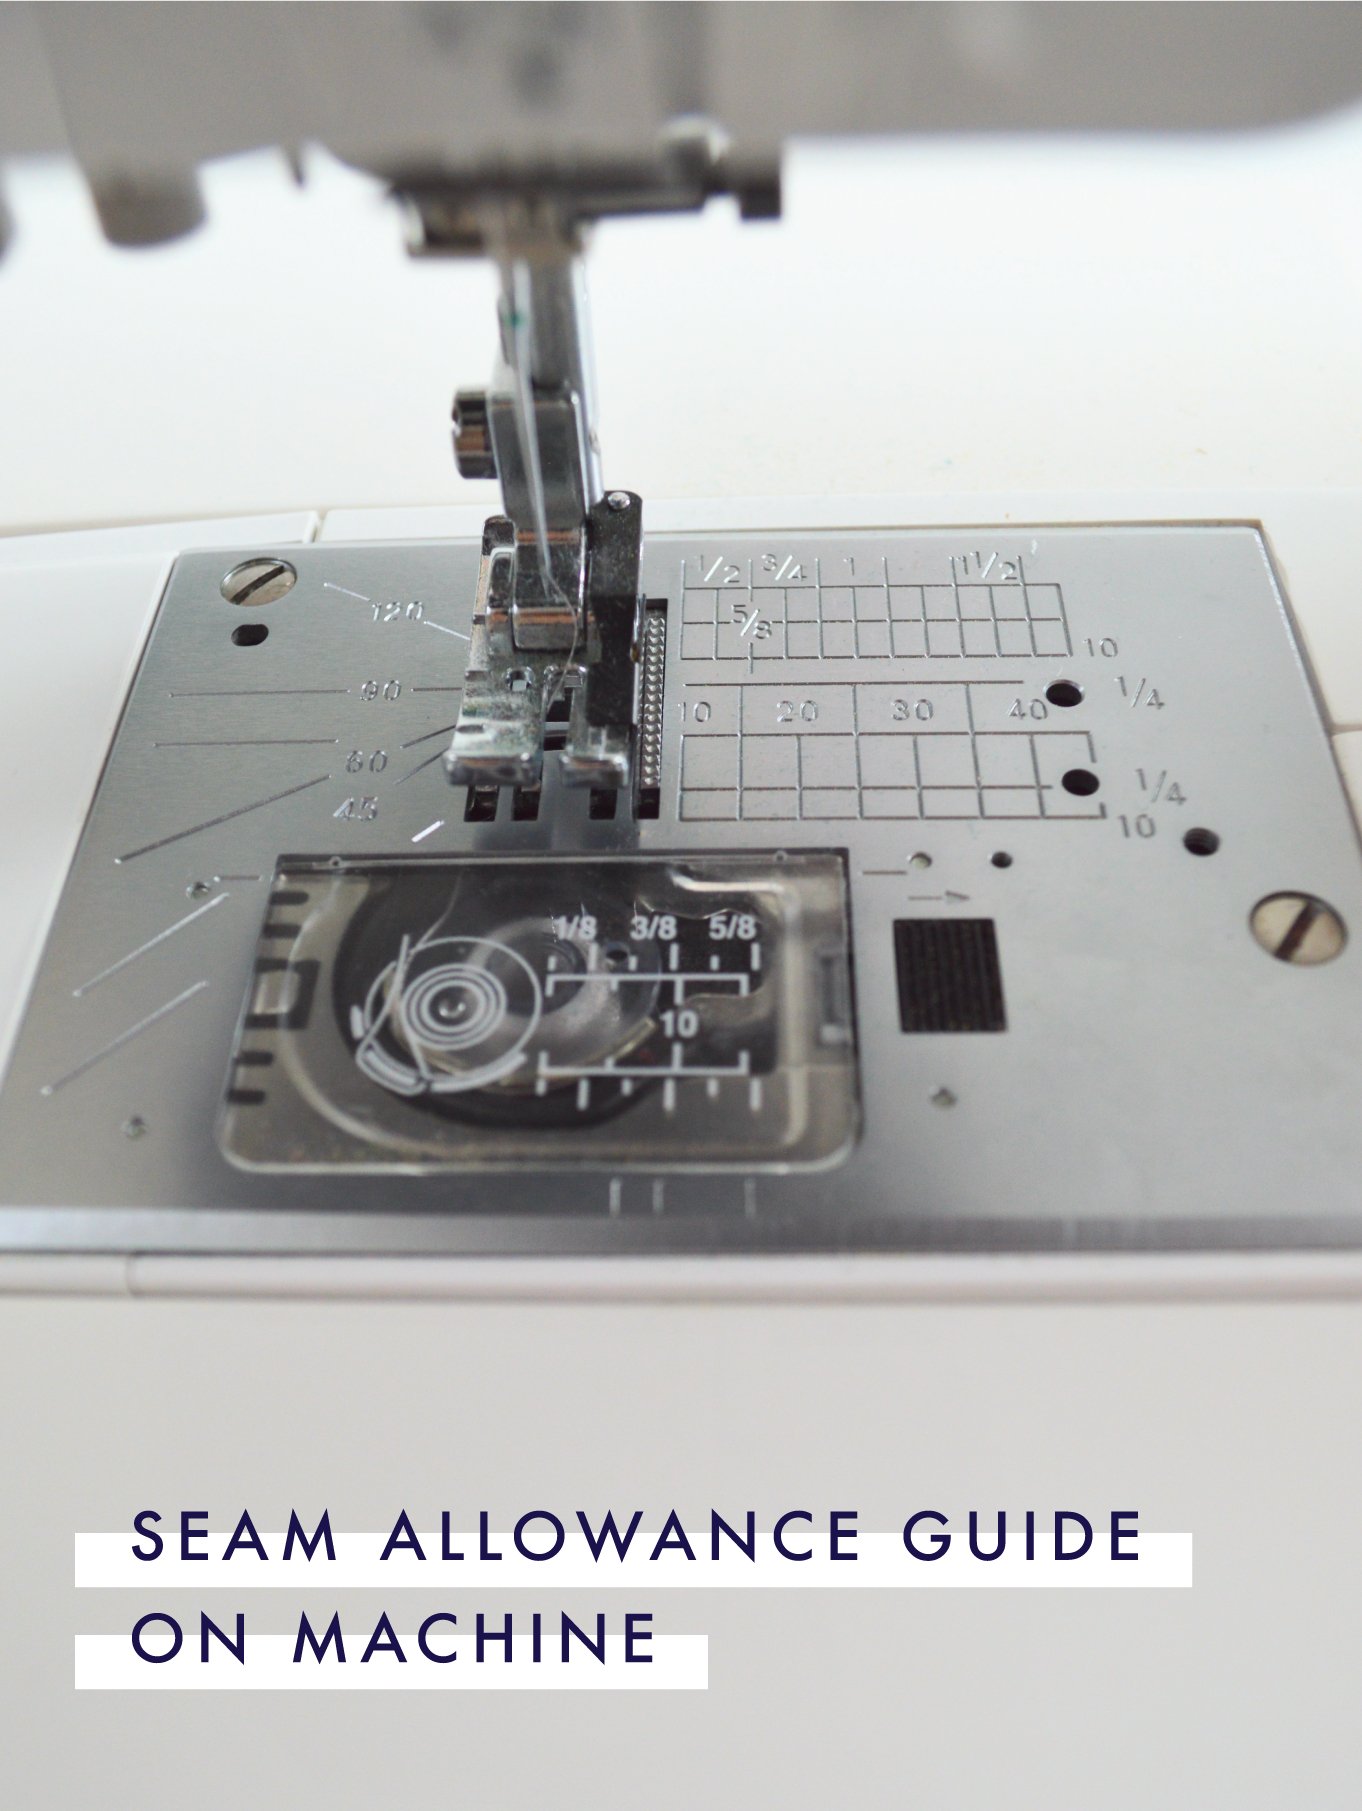
Equally as important as RST is the seam allowance. Seam allowance is the space between the edge of your fabric and the stitch you use to sew two pieces of fabric together. This measurement varies depending on what you are sewing (garments, bags, homewares, etc.) but in the quilting world 99% of the time you’ll be sewing with a ¼ inch seam allowance.
Sewing with a Machine
Most, if not all, sewing machines these days will have a ¼ inch mark or guide on the needle plate. If yours doesn’t you can easily make a guide by measuring ¼ inch from your needle to the right and placing a piece of tape (try washi, painter’s, or masking). Use the guide to line up the edge of your fabric while sewing.

Sewing by Hand
If you’ve decided to skip the machine and go for hand sewing I recommend marking a ¼ seam allowance directly on your fabric with a fabric pencil or hera marker.
Pressing Seams
After you’ve sewn a few pieces together and before you start matching up seam intersections you’ll want to press your seams with an iron to make sure they lay flat. The reason it’s called “pressing” and not “ironing” is because the idea is to avoid the back and forth motions that come with ironing so the seams don’t warp or twist in any way. The goal is to add heat and weight to get the seams a flat as possible and that’s it.
This is another area of quilting where there are two opposing preferences. You’ll usually find someone who is either team “open” or team “to the side”. Occasionally you’ll come across a quilter that has no pressing preference. Arguments can get heated (pun intended) over this topic so get ready to debate if you find yourself chatting with a quilter on the other team.

Pressing Seams Open
To press seams open, flip your fabric over so the seam allowance is facing up. Then spread the two pieces apart with your fingers and press with an iron until flat.
Pressing Seams to the Side
To press to the side, flip your fabric over so the seam allowance is facing up. Then use the iron to press your seams toward one side until flat. When using this method the seams are usually pressed toward the darker color fabric. Sometimes quilt patterns will come with specific pressing instructions so that seams will “nest” or lock into place when matching up intersections.
Matching Seam Intersections
Once you have a few blocks put together you’ll eventually find yourself in a place where two seams are about to match up, creating an intersection. This is where pinning really comes in handy. No quilt needs to be perfect, so if you’re finding you prefer to freewheel it, by all means, don’t let me stop you! But if you’d like those intersections to be neat and tidy then pinning liberally is the best course of action. This is also where pressing your seams comes into play. It’s much easier to sew over an intersection when all the seams are nice and flat.

Matching Intersections with Seams Pressed Open
If you press your seams open it’s quite easy to match them up while pinning. Pressing open also ensures the least bulky seam possible in every scenario.
Matching Intersections with Seams Pressed to the Side
If you press to the side there are two possible outcomes. You may find yourself in the wonderfully satisfying position of the bulk of the seams folded in opposing directions, resulting in an intersection that beautifully locks together or just snaps right into place. This is called “nesting seams” and a great technique to use for matching intersections.
Or, you may find that the bulk of the seams are folded in the same direction, meaning you’ll have to sew over six layers of fabric at once. While this outcome is not impossible to deal with, it’s not always fun or easy. Especially, if you’re looking for those perfectly matched intersections.
One way to avoid that is to plan. Purposely press all your seams to opposing sides so they all snap right into place. As I mentioned above, some quilt patterns come with specific pressing instructions to achieve just that.
Start Your Quilting Journey
Now that you know the basics and the first few steps of the quilting process it’s time to get started! Go find yourself some fabric, a beginner-level pattern, the tools needed, and jump in! Or if a pattern is too daunting try just cutting some squares and sewing them back together. As I mentioned above, my next post will be about the basting, quilting, and binding processes as well as a few other finishing techniques. Be sure to check back soon when you’re ready to move on to the final steps of the quilting process. I hope you found this helpful! If you have any questions or wish something more was covered please let me know in the comments, message me on Instagram, or send me an email at anna@waxandwanestudio.com.
More Learn to Quilt Blog Posts


Free Quilt Patterns